Experiment with M3 Open nodes
The M3 open node is based on a STM32 (ARM Cortex M3) micro-controller. Like the WSN node this next generation contains a set of sensors and a radio interface. Main evolutions are a more powerfull 32-bits processing, a new ATMEL radio interface in 2.4 Hz and more sensors. For more details please see here .
Aim of this tutorial
The aim of this tutorial is to discover the IoT-LAB testbed tools by creating and submitting your first experiment, and then interact with running nodes. You will reserve two M3 nodes via the OneLab portal, you will then hop onto the ssh frontend to access the reserved nodes, set them up with a sample firmware file, and it. Once the firmware is deployed, you will be able to interact with the nodes, read sensor values and send radio packets.
Prerequisites
Before starting this tutorial, please make sure that you have completed the following:
- You have an active account on the portal (to create an account please follow this tutorial: User sign-up)
- You have created or joined a lab (to create/join a lab please follow this tutorial: Lab)
- You have set up an experiment (to create an experiment please follow this tutorial: Experiment )
Reserving resources
You need to reserve two neighbouring m3 nodes on the same IoTLab testbed (to know how to reserve node please follow this tutorial: reservations-requiring-configuration-label)
Use ‘Filter’ to display only M3 nodes.
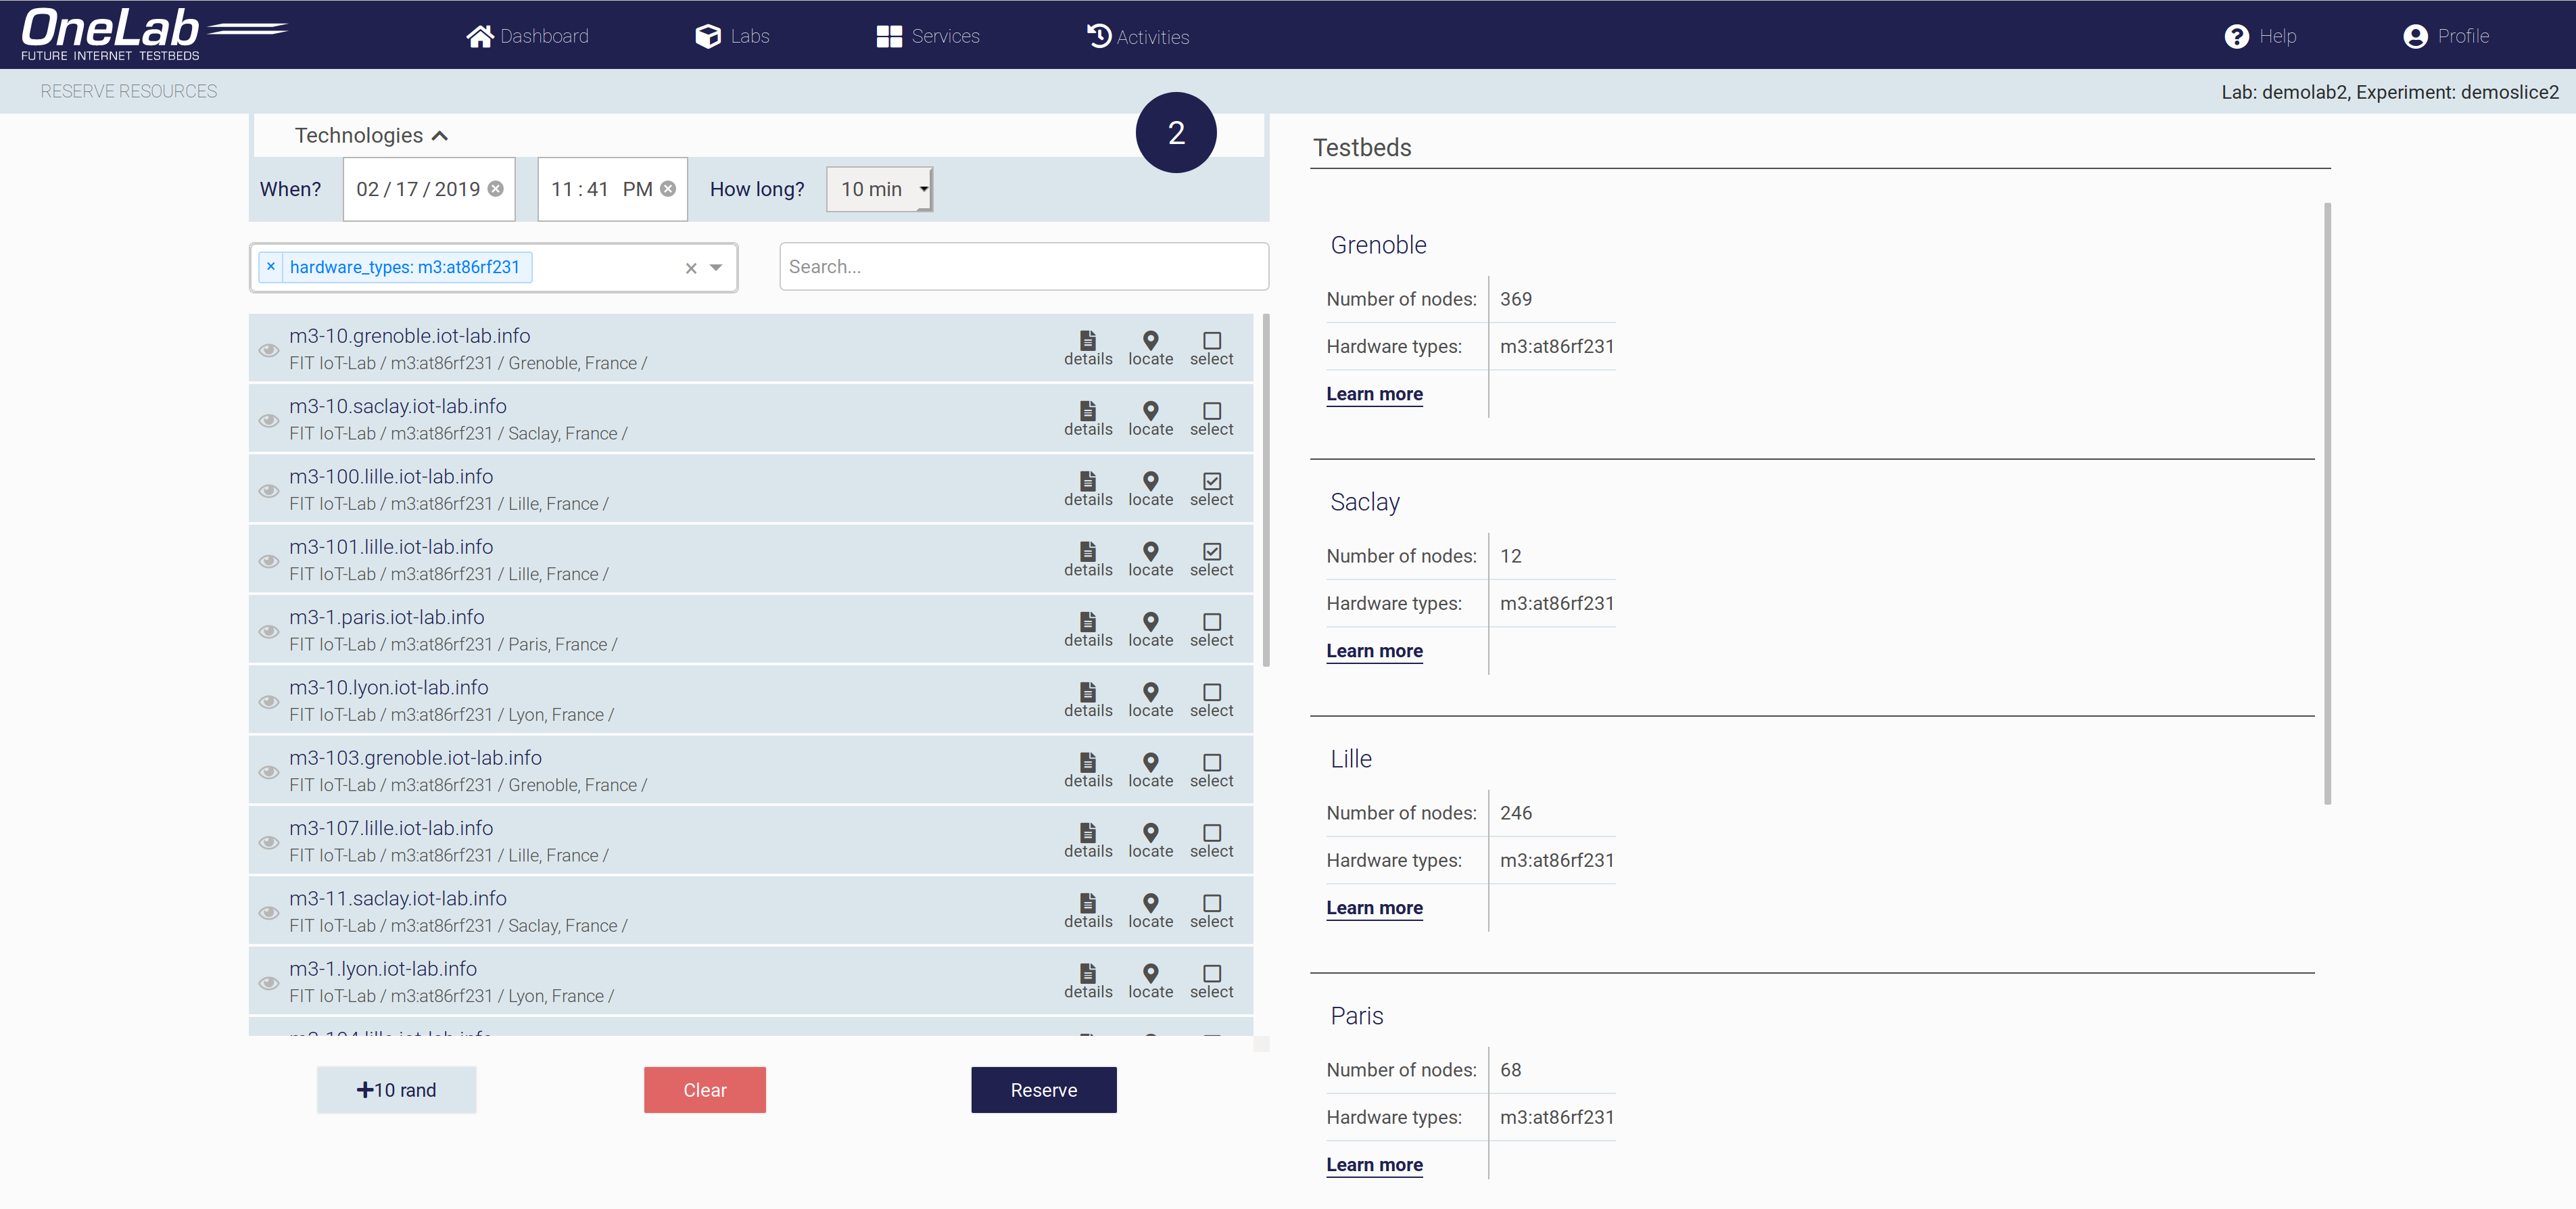
Selecting neighbouring m3 nodes on same iotlab testbed.
Accessing resources
Once you have successfully reserved the FIT-IoT Lab nodes, go to the dashboard and click ‘Go to your reservation’. You will be redirected your experiment. Here you will be able to see your reserved nodes, with instructions on how to access them directly. You will need your IoT API password. Click the button “Get IoTLab API password (by e-mail)” and you will recive it by mail.
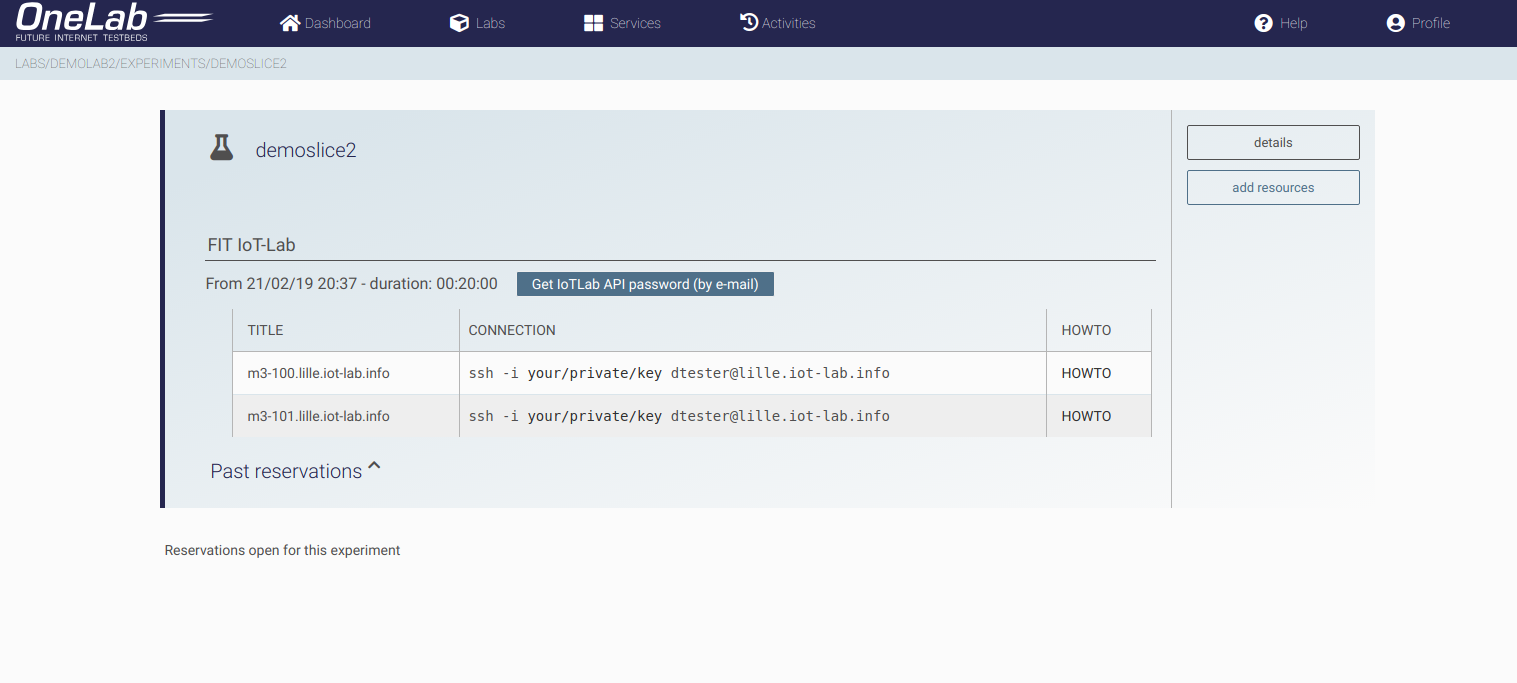
FIT-IoT Lab SSH command.
Your user-specific SSH command will appear in this page. This command will let you access through SSH to the resources, but before that, you need to download your private key.
NOTE: You need to have SSH client installed (on OSX and Linux the terminal clients are available by default, on Windows you can donwload and install Putty). Alternatively you may also run shell within browser (Mozilla Firefox or Google Chrome only). To know how to access your reserved nodes on different Operating Systems please follow this tutorial: Accessing reserved resources
Experimentation
Connect to the SSH frontend
Note: The appropriate ssh command will appear on your experiment page:
$ ssh <login>@lille.iot-lab.info
Authenticate your user with your iot-lab login and password:
Input:
$ iotlab-auth -u <login>

Output:
Password:
"Written"
Wait until the experiment state changes from “Waiting” to “Running”:
Input:
$ iotlab-experiment get -l --state Running

Output:
{
 "items": [
     {
         "date": 1550444695,
         "duration": 1800,
         "id": 154282,
         "name": "authonelabeu_demolab2_demoslice2",
         "nb_resources": 2,
         "owner": "dtester",
         "resources": [
             "m3-<id1>.lille.iot-lab.info",
             "m3-<id2>.lille.iot-lab.info"
         ],
         "state": "Running"
     }
 ]
}
Once the experiment state is “Running”, download the firmware:
$ wget https://raw.githubusercontent.com/wiki/iot-lab/iot-lab/firmwares/tutorial_m3.elf -O tutorial_m3.elf
Load the firmware on the “Running” nodes:
$ iotlab-node --update tutorial_m3.elf
Submit an experiment between 2 M3 nodes:
Input:
$ iotlab-experiment submit -n <exp_name> -d <duration> -l 2,archi=m3:at86rf231+site=<site>

Output:
{
   "id": <exp_id>
}
Display additional information about the experiment:
$ iotlab-experiment get -i <exp_id> -s
$ iotlab-experiment get -i <exp_id> -r
Interact with the nodes.
Provided firmwares offer an interaction menu via the serial port of the device.
The serial port is available from the ssh frontend using ”nc <device hostname> 20000”. For a m3 node:
Input:
$ nc m3-<id1> 20000

Output:
IoT-LAB Simple Demo program
Type command
 h:  print this help
 t:  temperature measure
 l:  luminosity measure
 p:  pressure measure
 u:  print node uid
 d:  read current date using control_node
 s:  send a radio packet
 b:  send a big radio packet
 e:  toggle leds blinking

Type Enter to stop printing this help
Test some commands to get sensors measures (t, l, p):
Input:
cmd > t

Output:
Chip temperature measure: 3.2733334E1
Test packet sending
Open a second terminal to connect to the serial port of another node
Make one of the nodes send a radio packet:
Input:
$ nc m3-<id2> 20000
cmd > s
cmd >

Output:
radio > Packet sent
Check that the other node has received the radio packet:
Output:
cmd >
radio > Got packet from A569. Len: 16 Rssi: -66: 'Hello World!: 0'
Congratulations!! You’ve successfully completed the tutorial.
To do more advanced tutorials please see here