Reserve resources on FITCloud
FITcloud or FIT Openstack Cloud is a research platform that provides researchers with access to customizable virtual private servers on the Openstack Cloud. Users can customize their virtual servers with the CPU, Memory and Storage capacities of their choice through the portal. The virtual servers will be available within minutes. The platform provides over a hundred of computing cores and terabytes of RAM (...) are made available to the researchers.
It runs an underlying Openstack Cloud distributed across 3 controllers nodes and several computes nodes deployed and managed with Canonical Juju. Please refer to the hardware specification here.
Reservation page
The resource reservation is a four steps process
- Resource selection
- Configuration
- Private Network Setup (optional) for multi-node reservation
- Scheduling

Resource selection

The available resources are presented in different preset configurations. However, some parameters such as the disk storage can still be changed in the configuration step. To add a new resource click on the “add” button. The resource will be added as a configurable item in the configuration section. You have up to 3 resources per reservation
Configuration
Once you have added some resources, you can now start the configuration. By default the advanced configuration fields are hidden since they are optional. If you want to set the advanced configuration click on the right arrow to expand the panel The advanced configuration allows the possibility to:
- Request a public ipv4 for the selected resource
- Remote execution of ansible playbooks and bash scripts after the resource provisioning.
- Configure resources with your own customized cloud-init
- Customize your disk storage
Please refer to Advanced Configuration for more details on the advanced configuration.

Private Network Setup
Some services need to run on a separate network (internal storage network, ...) or the communication between the reserved resources does not need to be established on the public network. To allow more flexibility in the isolation of internal services, we have implemented a feature to allow you to create a private network between the selected resources. This section is optional and it’s only available when multiple resources are selected.

Lab / Experiment(Slice)
Select a project/slice for the resources. If the scrolldown list is empty, you have to first create a project (lab) and add a new experiment. To do that, click on “Create a new experiment” as shown in the picture bellow.

Schedule
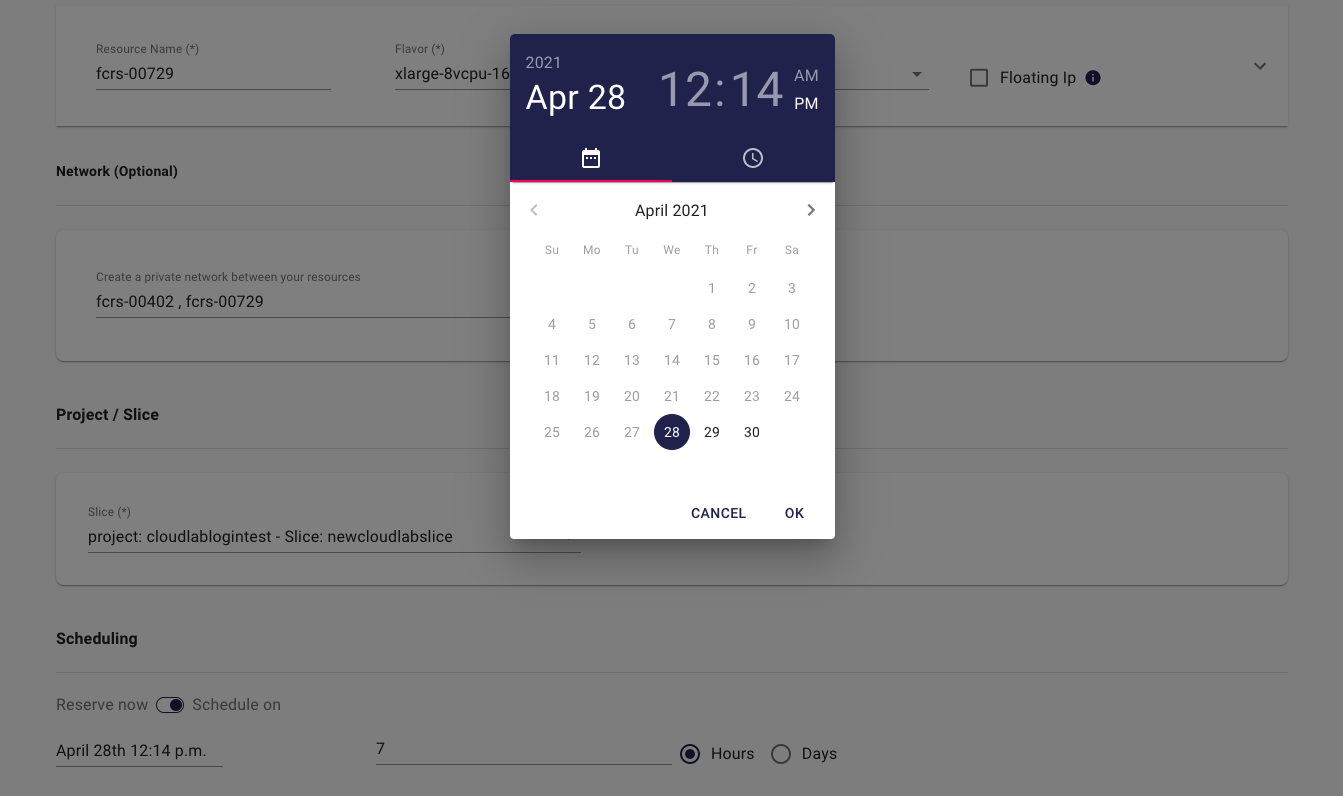
You can schedule the reservation immediately or choose another date using the scheduler. The maximum duration is set to 7 days. However, you can extend your reservation before its expiration. (/!you can no longer extend your reservation once expired, the extension request has to be submitted before) We do not store any data of your reservation and we do not provide backup of your service, which means once the reservation is expired, all the resource is destroyed and unrecoverable.

Summary
Summary of the reservation to review and edit if needed.

Accessing FITCloud resources
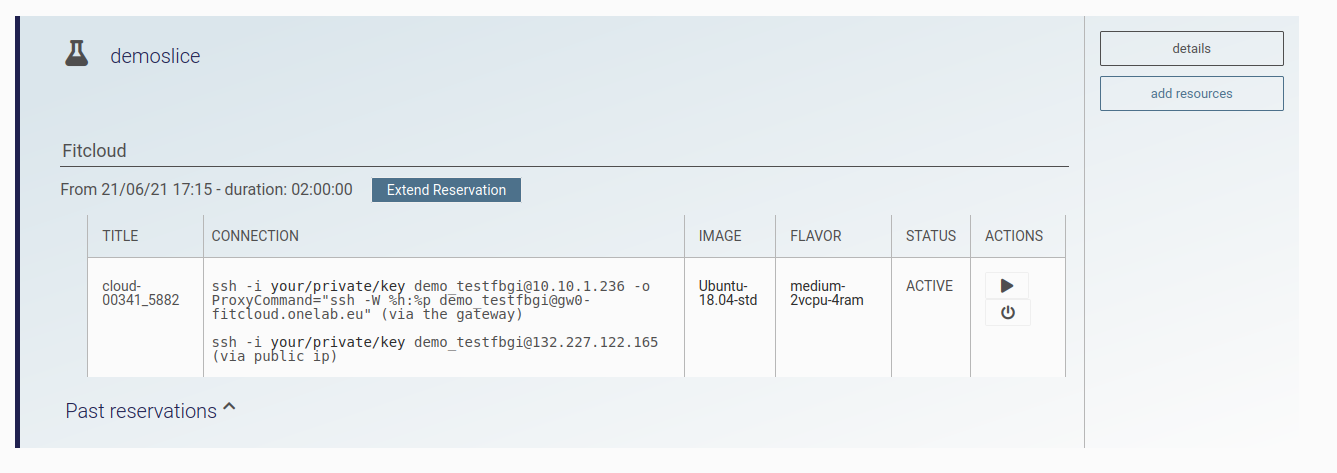
Once you have successfully reserved the FITCloud nodes, go to the dashboard and click ‘Go to your reservation’. You will be redirected your experiment. Here you will be able to see your reserved nodes, with instructions on how to access them directly.

FITCloud SSH command.
Your user-specific SSH command will appear in this page. This command will let you access through SSH to the resources, but before that, you need to download your private key.
If you have requested a public IP, you will be able to access to your resource directly. If no public IP is requested, then your resource will only be accessible via the gateway.
Please note that your username might change if you have configure the node with your own cloud-init file.
# Access to your resource via the SSH gateway
ssh -i path/to/your/private/key username@internal_node_ip -o ProxyCommand="ssh -W %h:%p username@controller_ip

# Access to your resource via the public ip
ssh -i path/to/your/private/key username@public_ip